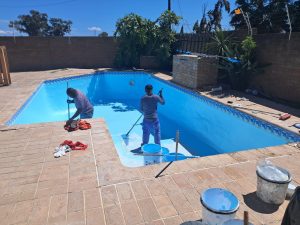
Before you pay anyone to find a pool leak, there is real detective work you can do yourself — and we say that as the people you would be paying. Honest DIY pool leak detection can confirm whether a leak exists, roughly where it lives, and sometimes find it outright. It also has hard limits worth knowing before you lift a single paver. Here is the full civilian toolkit.
Step one: prove the leak exists (the bucket test)
Evaporation in Cape Town wind fools everyone — so start by separating physics from plumbing:
- Fill a bucket with pool water and stand it on a pool step (weight it with a brick), water level matching the pool’s;
- Mark both levels — tape or marker — and switch the pump OFF;
- After 24 hours, compare: both dropped equally = evaporation; pool dropped meaningfully more = leak. Real numbers beat impressions — measure in millimetres.
Step two: interrogate the pattern

What the loss pattern tells you:
- Loses more with the pump ON → pressure-side plumbing (return lines)
- Loses more with the pump OFF → suction-side plumbing
- Loses the same either way → shell, fittings, light niche or weir
- Stops dropping at a specific depth → the leak is AT that level — inspect that ring of the pool
Step three: dye testing the suspects
Pool leak detection dye (or food colouring in a syringe) makes water movement visible: with the pump off and water dead still, release a whisper of dye beside a suspect — if there is a path, the dye visibly snakes into it. Work through the classic suspects in order: weir mouth and its joints, return fittings, the light niche perimeter, visible cracks, and the steps’ joins. Patience matters — dye testing rewards slow hands and punishes rippled water.
What DIY kits can and cannot do
The leak kits sold online are mostly dye plus patch material — fine for confirming and sealing a found, accessible fault like a weeping fitting. What no home kit does: find a leak in buried pipework. That takes pressure testing — isolating each line, pressurising it, and watching the gauge — which is exactly the professional half of the job. Guessing at underground leaks with a spade is how one leak becomes three; the whole method is described on our pool leak detection service page.
When to stop DIYing
- The bucket test confirms a leak but dye testing finds nothing visible — it is in the plumbing; pressure testing time;
- Loss exceeds a few centimetres a week — that volume undermines paving and backfill while you experiment;
- The suspect is the light niche or structural crack — both need proper repair, not a patch kit;
- Winter: a pool dropping through Cape rain has a guaranteed leak — skip straight to the professionals.
Bring us a completed bucket test and pattern observation and you have already shortened the professional visit — we pressure-test the lines, dye-test the shell, and hand you a written diagnosis with the repair priced. Book the assessment whenever your DIY evidence says “leak confirmed.”
Frequently asked questions
How accurate is the bucket test?
Very — it is the same first principle professionals use. Its only failure mode is impatience: run the full 24 hours, pump off, no swimmers.
Is food colouring safe as leak dye?
Completely — a few drops disperse and chlorine bleaches them. Purpose-made dye is just denser and easier to steer.
My pool only leaks in summer. How?
Suspect the equipment side: leaks on the pressure line show only during long summer pump hours. Run the pump-on/pump-off comparison and the pattern will confess.
What does professional leak detection cost?
It is quoted with the assessment — and it reliably costs less than the paving, water and chemical bills of a leak left running for a season.